Can a dog’s ears be safely cleaned with household vinegar? Yes, a strict 50/50 mixture of raw apple cider vinegar and purified water is a highly effective, natural solution for routine canine ear maintenance. The biggest takeaway is that this DIY acidic solution must never be squirted directly into the ear canal from a plastic bottle. Instead, owners must soak a large, soft cotton ball in the warm mixture, place it gently inside the ear flap, and massage the base to release the liquid. Vinegar works brilliantly for healthy maintenance, but it must be completely avoided if the ear is bright red, visibly inflamed, or scratched.
Understanding exactly how this natural pantry staple interacts with canine biology changes the entire grooming process.
The Ear Cleaning Mind Map
- The Golden Ratio: Exactly half distilled water and half raw apple cider vinegar to prevent skin irritation.
- The Delivery System: Utilizing soaked cotton spheres instead of terrifying, noisy plastic squirt bottles.
- The Biological Goal: Lowering the internal pH environment to make the canal intensely hostile to aggressive yeast strains.
- The Hard Rule: Never inserting Q-tips or rigid cotton swabs directly into the blind curves of the delicate ear canal.
3 Advanced Ear Health Insights Most Owners Miss
Generic pet grooming advice often treats all canine ears exactly the same, ignoring the complex biology happening beneath the fur. Elite canine behaviorists approach ear handling with very specific, highly scientific strategies.
- The Temperature Shock Factor: Cold liquids hitting a dog’s warm eardrum trigger an intense, involuntary panic response. Placing the mixed vinegar bottle in a warm water bath for ten minutes before cleaning completely eliminates this startling temperature contrast.
- The pH Balancing Act: Vinegar does not just physically wipe away loose, surface-level dirt. The acetic acid actively alters the microscopic environment of the entire ear canal, permanently disrupting the specific yeast strains that cause chronic canine ear funk.
- The Pre-Massage Strategy: Never start the process by immediately shoving a wet, strange-smelling cotton ball into the ear. Begin by gently massaging the base of the ear while it is completely dry, slowly rewarding the dog with high-value treats for tolerating the physical handling.
🚨 Vet Fact: Canine ear canals are uniquely shaped like a sharp, steep “L” rather than a straight horizontal tube. This evolutionary design aggressively traps heavy debris and dark moisture deep near the eardrum, making floppy-eared dogs highly susceptible to severe, recurring yeast overgrowth.
The Science of Apple Cider Vinegar
Why choose raw apple cider vinegar instead of standard white distilled household vinegar? Raw apple cider vinegar contains the “mother,” a highly complex collection of beneficial proteins, active enzymes, and friendly bacteria. This specific composition makes it significantly gentler on sensitive canine skin compared to the harsh, industrial-grade acidity found in pure white vinegar.
Using standard municipal tap water to dilute the vinegar is also a massive, frequently repeated mistake. Tap water contains microscopic minerals, heavy metals, and potential chemical contaminants that can easily irritate an already sensitive biological environment. Always use strictly distilled or heavily purified water when creating the 50/50 dilution to ensure absolute clinical safety during the cleaning process.
The acidic nature of the vinegar acts as an incredible natural astringent. It easily cuts through thick, greasy lipid layers of canine ear wax that normal water simply slides right off of. By breaking down these thick, waxy barriers, the vinegar allows the ear to properly breathe and naturally dry out.
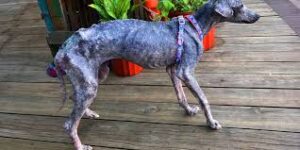
Take the case of a rescued Basset Hound suffering from a chronic, intense odor radiating from its long, heavy ears. The new owners wrongly assumed it was just a normal hound smell until the dog began furiously scratching its neck raw against the living room carpet. Implementing a weekly maintenance routine using the diluted vinegar method successfully cleared the trapped moisture and completely banished the strong yeast odor within a month.
Gathering the Right Cleaning Arsenal
Attempting to clean a dog’s ears while frantically searching for supplies is a guaranteed recipe for a highly stressed animal. Gather every single required tool in the bathroom before ever calling the dog into the room.
- Raw Apple Cider Vinegar: Must be unfiltered and unpasteurized for maximum biological benefit.
- Purified Water: Strictly distilled to avoid introducing foreign tap minerals into the canal.
- Jumbo Cotton Balls: Purchase the largest size available to prevent them from slipping too deeply into the ear.
- High-Value Currency: Plain boiled chicken, freeze-dried liver, or a dog-safe peanut butter lick mat.
🐾 Snoutbit Pro-Tip: Smear a thick, heavy layer of dog-safe peanut butter directly onto the bathroom wall tiles before starting the actual cleaning process. Licking acts as an intense, natural canine pacifier that dramatically lowers their heart rate and distracts them while their ears are being actively handled.
The Step-by-Step Behavioral Cleaning Guide
Forcing a dog into a corner to clean their ears destroys trust and makes every subsequent grooming session infinitely harder. The process must be structured around patience, positive reinforcement, and clear bodily autonomy.
Step 1: The Warm Dilution
Mix equal parts of the raw apple cider vinegar and the purified water in a small, clean bowl. Let the bowl sit inside a larger bowl filled with hot tap water for several minutes to gently warm the solution. Test the temperature on a human wrist first; it should feel perfectly lukewarm, never hot.
Step 2: The Soaked Sponge Technique
Take a jumbo cotton ball and submerge it entirely into the warmed vinegar mixture. Squeeze out the excess liquid so the cotton is heavily saturated but not violently dripping all over the floor. This completely silent delivery method bypasses the terrifying, hissing sound of a plastic bottle squirting directly near the dog’s highly sensitive eardrum.
Step 3: The Internal Squeeze
Gently lift the dog’s ear flap upward to naturally straighten out the internal “L” shape of the canal. Place the soaked cotton ball just inside the visible opening of the ear, being incredibly careful not to push it downward. Squeeze the cotton ball firmly, allowing the warm liquid to gently cascade down into the deeper sections of the ear canal.
Consider a family struggling with an energetic Golden Retriever who aggressively ran away whenever the ear cleaner appeared. The owners were making the classic mistake of squirting ice-cold liquid directly from a hard plastic bottle into the ear canal. Once they switched to warming the 50/50 vinegar mixture and using the silent, soaked cotton ball method, the dog completely stopped panicking.
Step 4: The Base Massage
Once the liquid is inside, immediately begin massaging the thick, fleshy base of the dog’s ear from the outside. A distinct, squishing sound should be clearly audible as the liquid physically breaks up the deep wax and trapped debris. Continue this gentle, soothing massage for at least twenty seconds to ensure the vinegar coats the entire internal structure.
Step 5: The Expected Shake
Step back and allow the dog to vigorously shake their head, which is their natural biological mechanism for clearing the ear canal. This forceful shaking action acts exactly like a centrifugal pump, launching the loosened wax and deep debris outward into the upper ear flap. Always keep a large towel nearby, as this step frequently flings liquid across the surrounding walls.
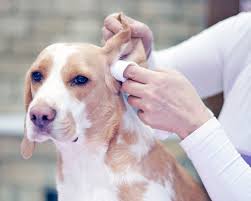
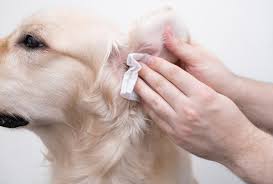
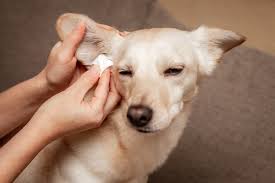
Step 6: The Final Wipe
Take a completely dry, clean cotton ball and gently wipe away all the loosened debris now coating the visible upper ear flap. Never insert fingers or dry cotton deep into the actual canal to fetch remaining wax, as this simply packs dirt further against the eardrum. Reward the dog immediately with a massive handful of high-value treats for successfully completing the routine.
🚨 Vet Fact: Healthy canine ear wax typically ranges from pale yellow to light brown and has virtually zero noticeable odor. If the discharge looks exactly like dark, thick coffee grounds, it is almost certainly a microscopic ear mite infestation requiring highly specific prescription medication.
Red Flags: When Vinegar Becomes Dangerous
While diluted apple cider vinegar is a fantastic preventative tool, it is explicitly not a medical cure for a raging bacterial infection. Knowing exactly when to put the household bottle down and call a professional veterinarian is a critical ownership skill.
Because vinegar is highly acidic, it causes excruciating, burning pain if it touches broken skin or open wounds inside the ear. If a dog actively yelps, cries out in pain, or aggressively pulls away the moment the liquid touches their skin, stop the process immediately. This intense pain reaction clearly indicates the delicate tissue is already ulcerated or severely scratched from chronic, aggressive scratching.
Furthermore, a foul odor resembling rotting meat, combined with thick yellow or bright green pus, points toward a massive bacterial infection rather than simple yeast. Vinegar cannot cure deep bacterial issues and may actually drive the dangerous infection deeper into the middle ear. These specific symptoms require professional bacterial cultures and potent prescription antibiotic drops to safely resolve.
What To Do Next
Ready to establish a calm, highly effective ear maintenance routine that saves money and prevents chronic discomfort? Take these two simple, immediate steps today:
- Perform the Sniff Test: Lift the dog’s ear flap today and take a very deep breath near the canal. If it smells strongly of corn chips, yeast, or old gym socks, it is time to correctly mix a fresh batch of the vinegar solution.
- Purge the Grooming Kit: Throw away any rigid Q-tips currently sitting in the canine grooming supply box to remove the temptation entirely. Purchase a fresh bag of extra-large, organic cotton balls to ensure the cleaning process remains entirely safe for the internal eardrum structure.
Disclaimer: The content on Snoutbit.com is for informational and educational purposes only and is not intended to replace professional veterinary advice, diagnosis, or treatment. Always consult with your veterinarian before making significant changes to your dog’s diet, exercise routine, or health regimen.